3.4 3D Scenes
MicroCity 3D Scene (*.m3d) is a data file format to store 3D scenes' information. Popular 3D file formats including 3D Studio Max (*.3ds), Wavefront OBJ (*.obj) and Stereolithography (*.stl) can be loaded as objects in a scene (see below) but not be stored in the .m3d file.
Opening, Creating, Saving and Closing 3D Scenes
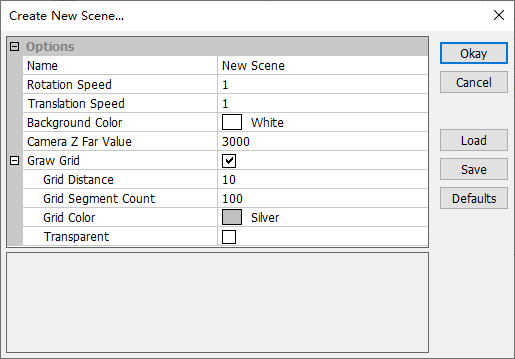
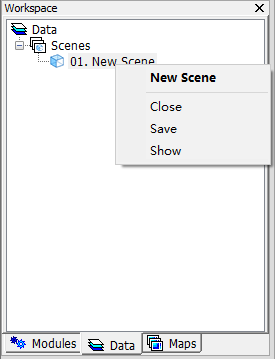
Users can click Load button  or File->Scene->Load menu item to open a Scene. Creating new Scene can be done from menu File->Scene->New and fill the pop-up dialog as shown below. After pressing Okay button an item will appear in the Data Tab of the Workspace Panel. Then Scene can be saved or closed through right-click menu:
Showing and Editing 3D Scenes
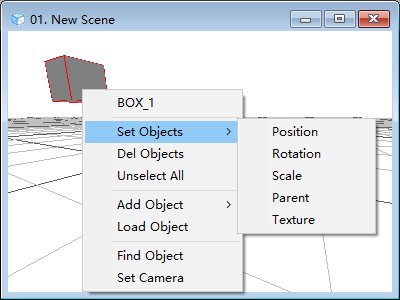
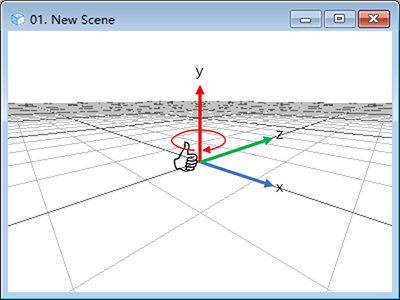
Double click a Scene from the Data tab will give you a scene view. Left-mouse-dragging in a scene veiw will rotate the camera and right-mouse-dragging will translate the camera. Double-left-clicking a scene view can select objects and Double-right-clicking a scene view can popup a context menu (shown below). One can add objects, load objects and set objects, etc.. Note that the Rotation in the coordinate system should obey Left-hand rule. The illustration of the coordinate system and an example of the rotation around y-axis is shown below:
The coordinate used in the position and rotation of an object is relative to its parent object. By default, the parent of a new object is null.
Display Settings
Users can change the background color, reference grid or other display options of a Scene by using Settings Panel.